From gaming sessions to important video calls, screen recording is a handy tool for capturing everything that happens on your screen. If you are looking to master how to do screen recording on HP laptop, this guide will discuss the basics of how to screen record on HP laptop, including the built-in tools and popular third-party software options.
When you are done reading, you will know how to record screen on HP laptop- from setting up your recording to editing and sharing your videos. So, let’s not wait anymore!
Preparing for Screen Recording on an HP Laptop
Before you start recording, get your HP laptop ready for screen recording. Here’s how to check and prep:
Checking System Requirements: Ensure smooth screen recording on HP laptop with necessary system requirements:
- Processor: A modern multi-core processor (like Intel i5 or better) will help handle the seamless recording.
- RAM: At least 8 GB RAM to optimize performance.
- Storage: Have enough free space on your hard drive or SSD to save your recordings, as screen recordings can take up quite a bit of space, especially in high quality.
- Graphics Card: A separate graphics card can be used for high-quality or gaming recordings.
Selecting the Right Screen Recording Software: Choosing the right software is primary to getting the best results. Here are a few popular options for screen recording on an HP laptop:
- Windows Game Bar: This built-in tool is great for quick recordings, especially for gaming. Easy to use with basic features, it is perfect for simple tasks.
- OBS Studio: A free yet powerful tool that is widely used for more advanced recordings. It offers great customization and is apt for high-quality recordings or streaming.
- Camtasia: This is a paid option that offers both recording and editing capabilities. It is ideal if you need to create professional-looking tutorials or presentations.
Using Built-in Screen Recording Tools
Want to know how to do screen recording on hp laptop without installing extra software? Use the built-in tools on your HP laptop:
Windows Game Bar
Windows Game Bar is handy for screen recording on HP laptop, especially if you are into gaming or need to capture simple tasks. Here is how to use it:
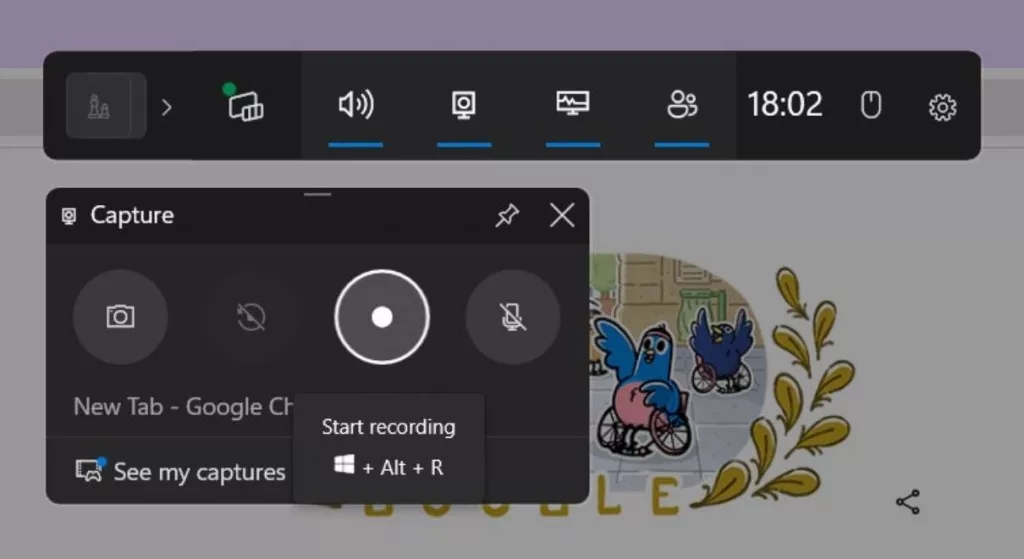
Step 1: Click on the Windows key+G to access the Game Bar overlay. If asked, select the “Yes, this is a game” option. With this, the Game Bar can function even if you are not recording a game.
Step 2: Click the Record button (a circle icon) in the Game Bar or press the Windows key + Alt + R to start recording. Use the Stop button (a square icon) to stop recording, or click on the Windows key + Alt + R again. Press the Pause button (two vertical lines) to pause the recording, and resume by clicking Resume.
Step 3: Your recordings are automatically saved to the Videos > Captures folder in your File Explorer.
Step 4: For basic editing, you can use the Photos app on Windows, which allows you to trim your videos.
Windows 11/10 Snipping Tool
The Snipping Tool is primarily for capturing screenshots, although you can also use it for simple screen captures. However, it is not a full-fledged screen recording tool but can be used for basic needs.
Step 1: Search for “Snipping Tool” in the Start menu and open it.
Step 2: Select the “New” option to start a new snip, and select the area of the screen you want to capture. After capturing, you can save the image or copy it to your clipboard.
This tool, while great for screenshots, is not designed to record video. For screen recording on HP laptop, the Windows Game Bar is your best built-in option.
Using Third-Party Screen Recording Software
Want more advanced features and better control over your recordings? Third-party screen recording software can be your savior. This part of the HP laptop screen recording guide will help you with two popular options: OBS Studio and Camtasia:
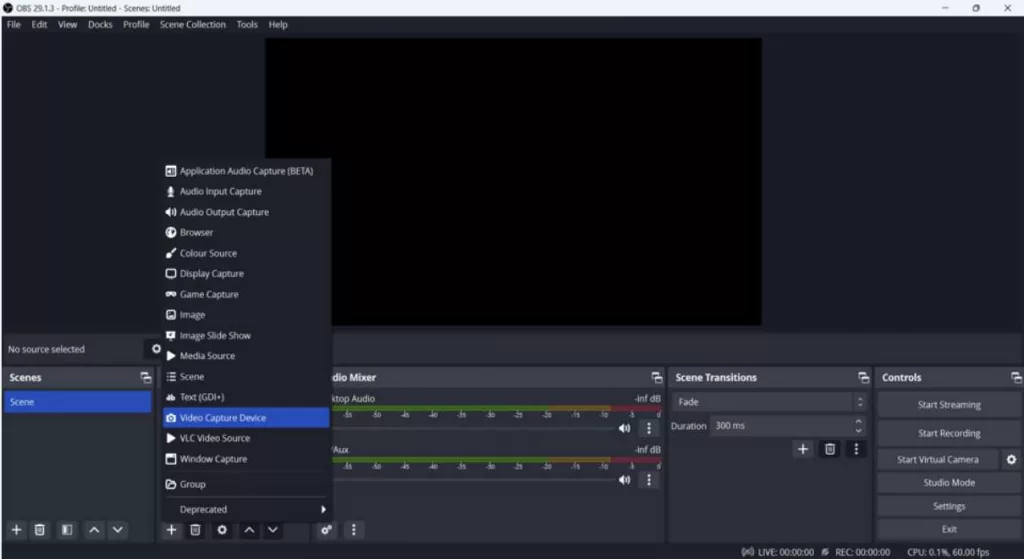
OBS Studio: It is a powerful tool that is not just great for high-quality recordings and live streaming but also free. Here’s how to set it up and use it:
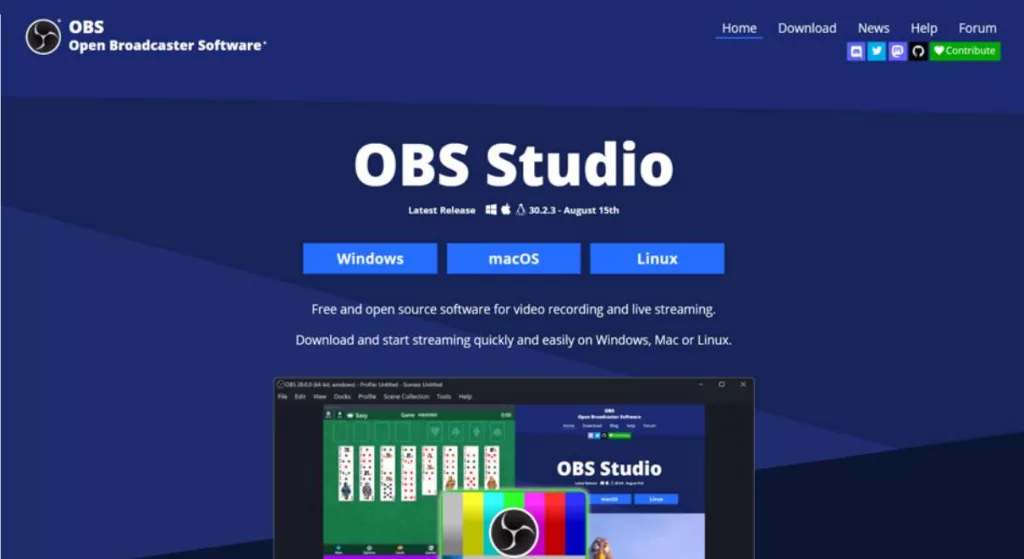
Installation and Setup: Go to the OBS Studio website to download the software. Open the installer, follow the on-screen prompts, and install OBS Studio on your HP laptop.
Recording Settings: Open OBS Studio, and you will see a blank canvas. Under the Sources box, click on the “+” to add a recording source. Choose the “Display Capture” option to record your entire screen or “Window Capture” to record a specific application.
Go to Settings by clicking on the settings/gear icon. Under Output, you can adjust the video bitrate and format for your recordings. Higher bitrate settings will improve quality but increase file size.
Starting and Stopping Recordings: Click “Start Recording” in the lower-right corner. Click “Stop Recording” to stop. Your videos will be saved to the folder mentioned in the Settings.
Camtasia: A paid tool that offers both screen recording and advanced editing features. Here’s how to use it:
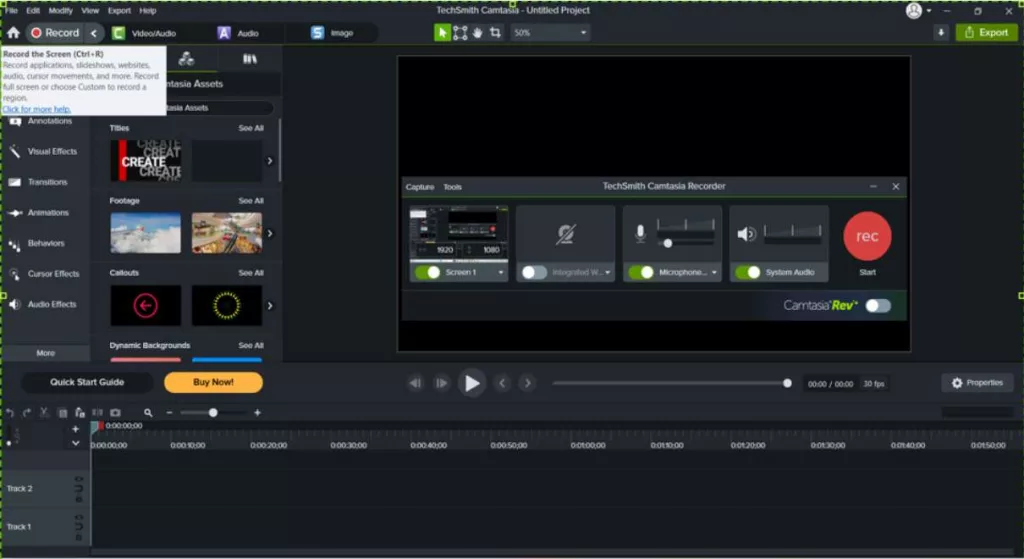
Installation and Configuration: Download Camtasia from the TechSmith and follow their instructions to install it on your HP laptop.
Recording and Editing: Open Camtasia and select the “New Recording.” Select the area of your screen you want to record, and choose whether to capture audio from your system or microphone.
Once you start recording, Camtasia will save your footage. After recording, its editor will open and let you trim, cut, and add effects to your video.
You get better flexibility and features with third-party software. With the HP laptop screen recording guide, pick the option that suits you to create high-quality videos easily.
Tips for Effective Screen Recording
Follow these tips to get the best results while screen recording on your HP laptop.
Prep Your Screen
- Tidy up your desktop before you record. Close unnecessary programs and remove icons or windows that are not needed.
- Arrange the windows you will use in an orderly way. If you are recording a tutorial, ensure all the tools or applications you will be showing are easily visible.
- Turn off notifications to avoid interruptions, or use Do Not Disturb mode.
Recording Quality
Check your audio to ensure your microphone and system audio are correctly set up. Test your microphone, and for system audio, adjust the volume to make sure it is just right.
Choose a suitable resolution to match your screen size for clear and high-quality recordings. Typically, 1080p (Full HD) is a good standard for most recordings. Higher resolutions may result in larger files.
A consistent frame rate of 30 fps (frames per second) is usually sufficient for most recordings. For fast-paced content, like gaming, you can use 60 fps to capture smoother motion.
Troubleshooting Common Issues
If your recording is lagging, try closing other applications that are using your laptop’s resources. You can also lower the recording resolution or frame rate.
If your audio is too quiet or distorted, check your microphone settings and position it correctly. Properly configure your recording software’s audio.
Review your recording before finalizing it. Check for video quality issues, audio clarity, or unwanted distractions.
Editing and Enhancing Your Screen Recordings
Remove any mistakes, add useful elements, and make your content more engaging by editing and enhancing your screen recordings. Here’s how:
Basic Editing Tools
Trimming: Most video editors allow you to remove unwanted parts to keep your video focused and to the point.
Cutting Segments: You can also cut out sections where mistakes or irrelevant content are present.
Adding Annotations and Labels: Emphasize key points or explain what is happening in your video. Most editors let you insert text boxes that you can customize with different fonts, sizes, and colors.
Incorporating Transitions:
Smooth Changes: Use transitions to make changes between different sections of your video smoother. This helps keep the viewer’s attention and makes the video flow better.
Advanced Editing Techniques
Adding Visual Effects: Enhance your video with effects like zoom-ins or highlight areas of the screen to draw attention. These can be useful for focusing on specific parts of the content.
Audio Effects: Adjust the volume levels and add background music or sound effects to make your video more engaging. Just be sure the audio does not overpower your main content.
Using Annotations and Callouts:
Highlighting Information: Add callouts or shapes to point out important details on the screen. This is especially helpful in tutorials where you want to direct attention to specific areas.
Color Correction:
Adjusting Visuals: If your video looks too bright or dark, you can adjust the color balance to improve the overall appearance.
By editing and enhancing your screen recordings, you can make your raw footage look polished in the final cut.
Saving and Sharing Your Screen Recordings

After editing your screen recordings, here is how to make sure your videos are saved correctly and shared effectively:
File Formats and Quality Settings
Choosing the Right File Format:
MP4: This is a common and widely supported format for videos, which provides good quality while keeping file sizes manageable. MP4 is ideal for sharing on most platforms.
AVI and MOV: These formats offer higher quality but can result in larger file sizes. They are useful if you need to maintain high video quality but might not be necessary for online sharing.
Adjusting Quality Settings:
Resolution: Save your video in the highest resolution possible that still fits your needs. For most purposes, 1080p (Full HD) is a good choice. If you want a more professional look, you might choose 4K if your software and hardware support it.
Bitrate: A higher bitrate improves video quality but also increases file size. Adjust the bitrate based on your needs, balancing quality and file size.
Sharing Your Recordings
Uploading to Platforms:
YouTube: To share your video on YouTube, log in to YouTube account, click the upload option, and select and upload your video file. Add a title, tags, and description to help people find your video.
Social Media: To share on social media platforms like Facebook or Twitter, simply upload your video file directly through the platform’s upload feature. Make sure to include a catchy description and relevant hashtags.
Sharing via Cloud Services:
Google Drive or Dropbox: Upload your video to a cloud storage service and share its link. This is useful if you want to share large files without uploading them directly to social media.
Direct Links: If you are collaborating with others or need to send the video privately, you can use cloud services to share direct download links.
Emailing Videos:
Attachment Limits: Most email services have a file size limit for attachments (usually around 25 MB). For larger videos, use cloud storage links or compress the video if possible before attaching it to your email.
Best Practices for Screen Recording
Maintaining Privacy and Security
Hide sensitive and personal information, such as passwords, private emails, or financial details, before recording. If you accidentally capture something you do not want to show, use video editing tools to blur or crop out those parts.
Log out of personal accounts to prevent accidentally showing sensitive information. Turn on Do Not Disturb to avoid notifications and distracting viewers or interrupting your recording.
Optimizing Performance
Close any apps or programs that you do not need for your recording to help your laptop run smoothly. Check Task Manager (Ctrl + Shift + Esc) to see if any programs are using a lot of your computer’s resources and close them if necessary.
Choose the resolution to match your screen size. For most uses, 1080p (Full HD) is a good choice.
Set the frame rate to 30 fps (frames per second). If you are recording fast-paced content, like gaming, 60 fps might be better.
Organize your desktop before recording. Close unnecessary windows, and arrange the ones you need.
Adjust window sizes and position them correctly to prevent important content from being cut off or appearing cluttered.
Test your setup by doing a quick test: Record a short test video to check the audio and video quality. This lets you make sure everything looks and sounds good before you start your main recording.
Common FAQs
How Do I Record My Screen with Audio?
If you are using Windows Game Bar, enable both system audio and microphone audio. Go to the Game Bar settings and check the options for capturing audio.
For third-party tools like OBS Studio or Camtasia, look for audio settings where you can choose to record both system sound and microphone sound.
Can I Record Games or Software with High Frame Rates?
Yes, you can record games or high-performance software, but:
Check if software settings are set to a higher frame rate (like 60 fps) to capture smooth gameplay or high-speed actions.
Close other programs and adjust your recording settings to match your game’s resolution and frame rate.
How Do I Adjust the Recording Resolution and Frame Rate?
Windows Game Bar: Check the settings to ensure you are recording at the resolution of your screen.
OBS Studio: Settings>Video>Desired resolution (e.g., 1920×1080) and frame rate (e.g., 30 or 60 fps).
Camtasia: Choose the recording area’s resolution and adjust the frame rate in the recording settings when setting up a recording.
Conclusion
Now that you know how to master screen recording on your HP laptop, you can create clear, engaging videos. Let’s recap what we discussed above.
Make sure your laptop meets the system requirements and choose the right software for your needs. Learn how to use Windows Game Bar and Snipping Tool for basic recordings. Get familiar with OBS Studio and Camtasia for more advanced features and editing options.
Keep your screen organized, check privacy settings, and optimize performance for the best results. Use basic and advanced editing techniques to make your recordings look professional. Choose the right file format and share your recordings through various platforms. Ensure privacy, optimize settings, and prepare your setup for a smooth recording experience.
Start recording- your audience is waiting to see what you have got to share. Experiment with different kinds of tools and techniques to find what works best for you